

How To Create Single Page Application In Angularjs
Part II: Front-End: Creating a Single Page Application with AngularJS
![]()

Part I of this tutorial (back-end) can be viewed here. Step 5 — Create the index.html
For this example, we will be using a Bootstrap 4 template. In the head, we have our CDN tags for Boo t strap 4, jQuery, Tether.io, and Font Awesome. Font Awesome is an icon library that we are using in lieu of Glyphicons, which are no longer packaged with Bootstrap. Keep in mind that the Font Awesome CDN tag is unique and you must have a Font Awesome account to generate one, but the account is free to make. We also include our custom CSS file, which we will get to at the end of the tutorial. **NOTE: I have revised the JavaScript files to adhere to best practices. I did not update the HTML files but all you need to do is prepend the controller name to any references to controller variables (e.g. OpenController.data.tickets instead of just data.tickets). The main reason for the change is that adding variables to the $scope object is bad practice and reduces readability.**
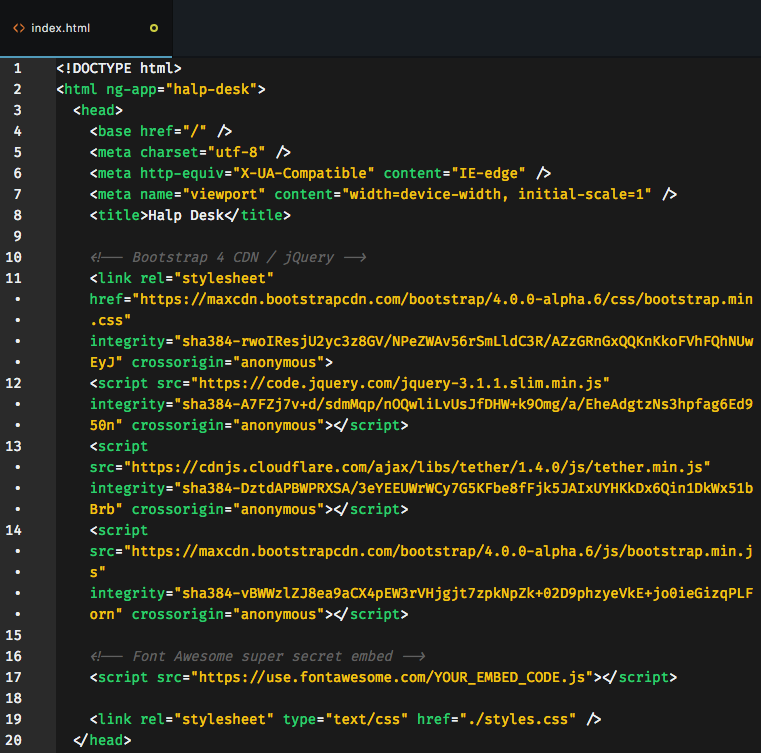
Most important here is the ng-app="halp-desk" attribute we attached to the html tag.
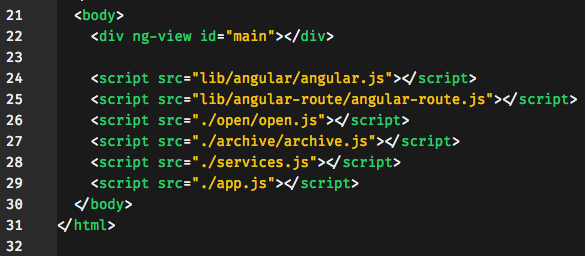
Next we set up the body. The <div ng-view id="main"></div> tag is where we will render our two 'pages' (Open Tickets and Archived Tickets). We then include all of our client-side JavaScript files at the bottom of the body, including angular.js and angular-route.js, which we installed with Bower.
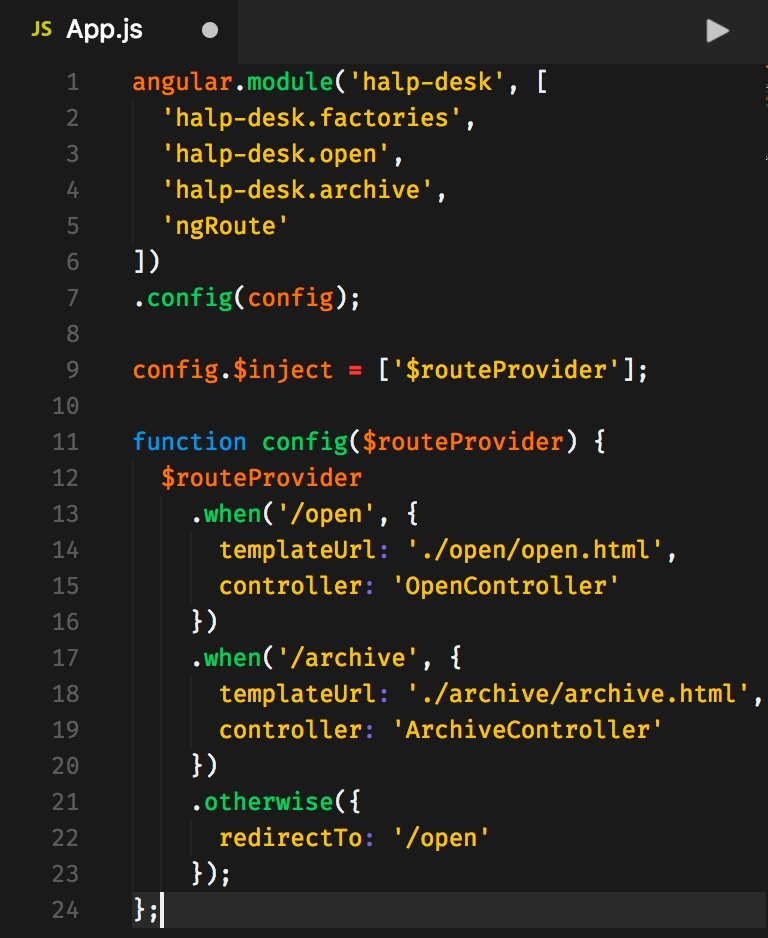
Step 6 — Instantiate the Client-Side Routes
Now let's take a look at app.js. This is where we will instantiate our client-side routes. We will have two pages, the Open Tickets page, which is the landing page, and the Archived Tickets page. When the client requests the '/open' route, we will return open.html, which will render in <div ng-view id="main"></div>. When the client requests the '/archive' route, we will return archive.html, which will render in <div ng-view id="main"></div>, replacing any content that was there. If the client requests any route other than those two, we will redirect to the landing page — open.html.
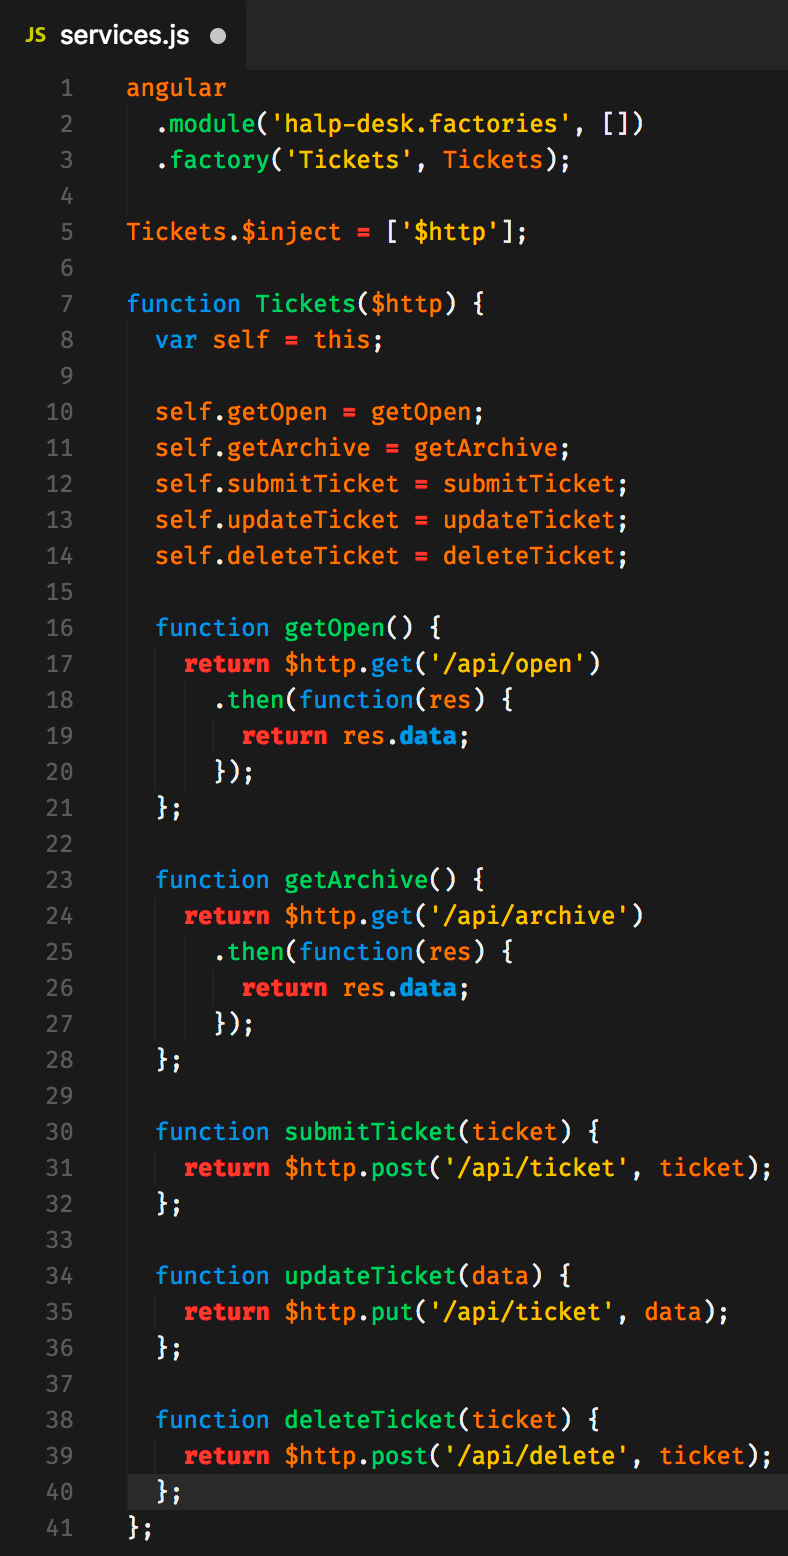
Step 7 — Create the Factory
Our factory will contain all of the server requests in the form of function expressions. When called, they will send a request to the server and return the response from the server. This should look pretty familiar as this is how we designed the routes on the server. The GET requests do not take any arguments but send a GET request to the server and return the response from the server — either the open tickets or the archived tickets. The submit and delete POST requests, as well as the PUT request, require a ticket argument in order to post to the database.
Step 8 — Create the Open Tickets View and Controller
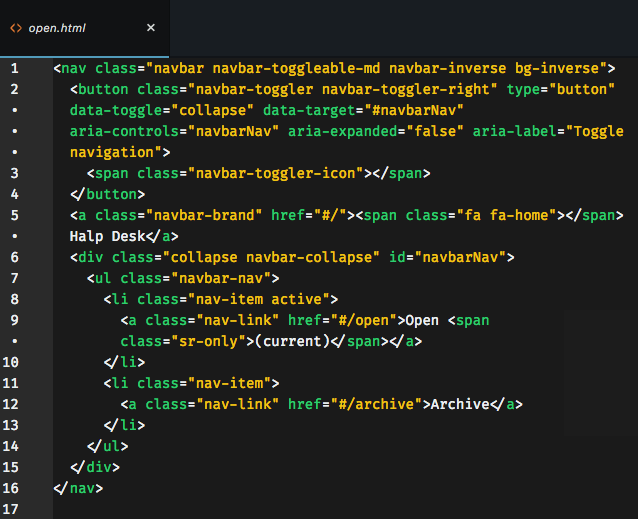
We start the Open Tickets view with a Bootstrap nav bar. Notice that the Open link refers to '#/open', which was defined above in Step 6. Same for the Archive link.
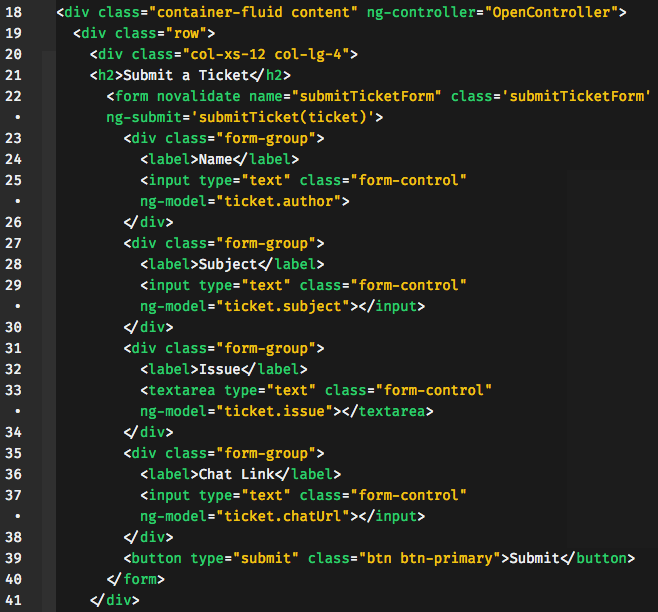
Next we create the content area, consisting of one outer container and a row with two columns. On the outer container we add the ng-controller="OpenController" attribute, which will handle any function calls to GET, POST, or UPDATE data.
The first column is our form for submitting a help desk ticket. When the submit button is clicked, the ticket data is sent to the OpenController submitTicket function. We have four input fields to gather the content needed for a POST request to the database. The remaining two — archive and status — will always be set to false and true respectively when creating a new ticket. I did not actually use the status property for this tutorial, but for more advanced functionality, so you can ignore it in this tutorial.
The second column is where we render the tickets. You can ignore the resolveTicket function call — it corresponds to the status property and is not used in this tutorial. We use the ng-repeat attribute to display all tickets in the $scope.data object, which we will get to shortly. Each reference to {{ticket.PROPERTY}} references the $scope.data object. On line 52 you can see a conditional that determines the class-name, which affects the styling. There is another conditional between the div tags to display the ticket status. On lines 56–58 are examples of how to use Font Awesome icons, each of which are wired to a function call to either delete or archive the ticket.

Now let's look at the controller. The first thing we need to do is create the data object, where the html page can access the tickets it needs to render. Then we create the getTickets method. It takes no arguments, but calls the getOpen method of the Tickets factory, which returns the open tickets. We also call this function in our initialize function so that the open tickets render on the landing page when the app loads.
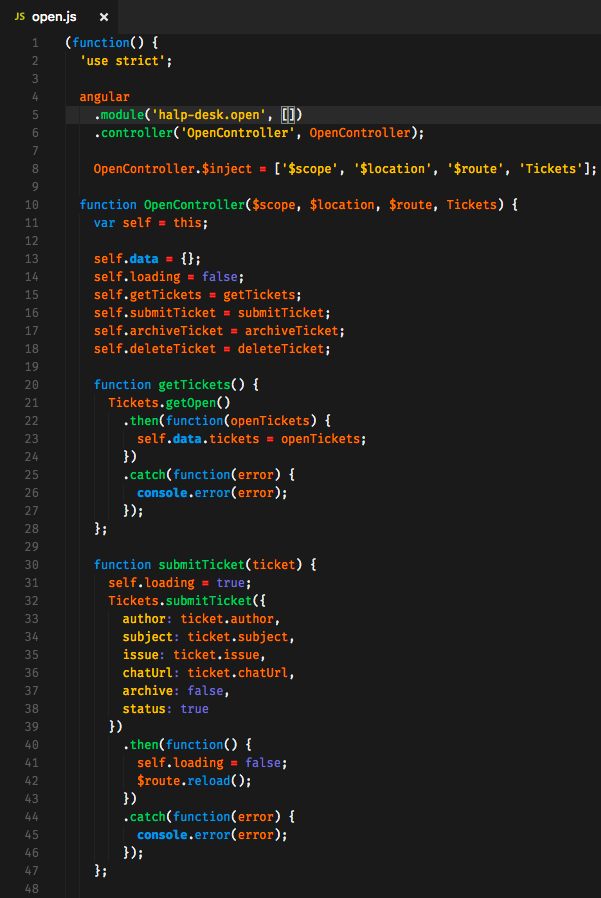
The submitTicket method takes a ticket argument containing the data necessary to create a new ticket in the database. Each new ticket is instantiated with 'archive: false' and 'status: true' properties. We then send the complete ticket to the submitTicket function of the Tickets factory and reload the page with the new content.
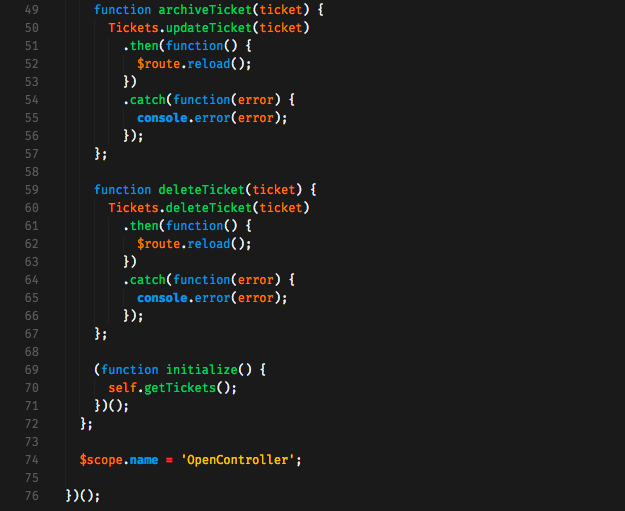
The archiveTicket and deleteTicket methods each take a ticket argument and send that ticket to the updateTicket and deleteTicket method of the Tickets factory, respectively. We then reload the route so that the current page updates accordingly. Lastly, we name this scope 'OpenController', which binds the data in open.html to the OpenController.
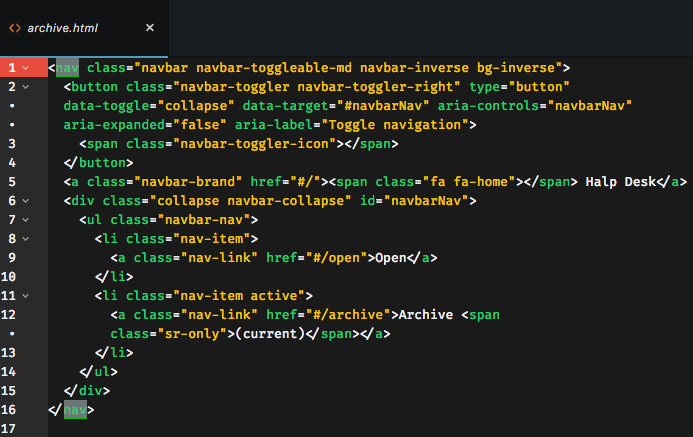
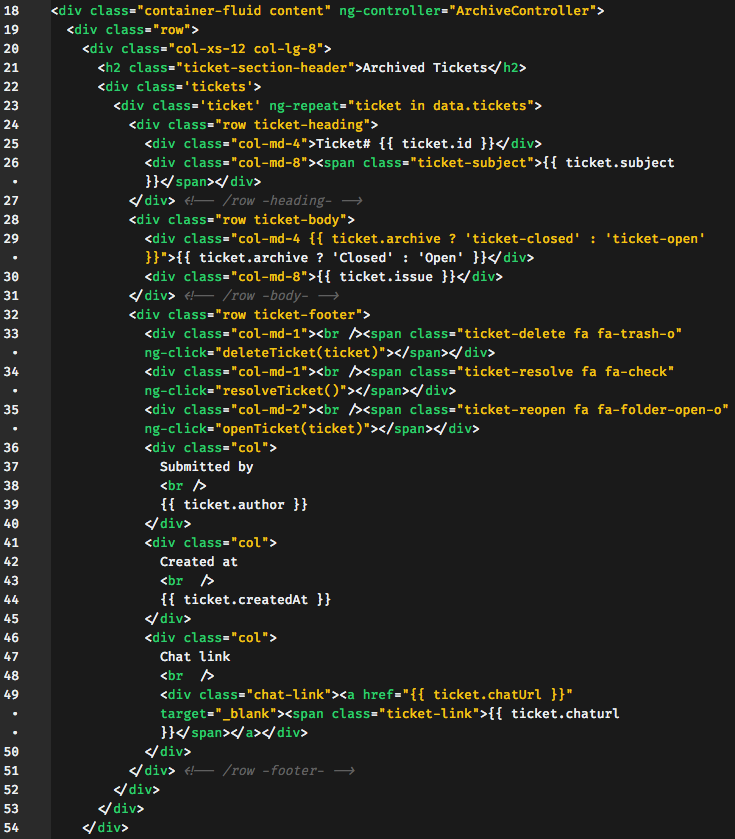
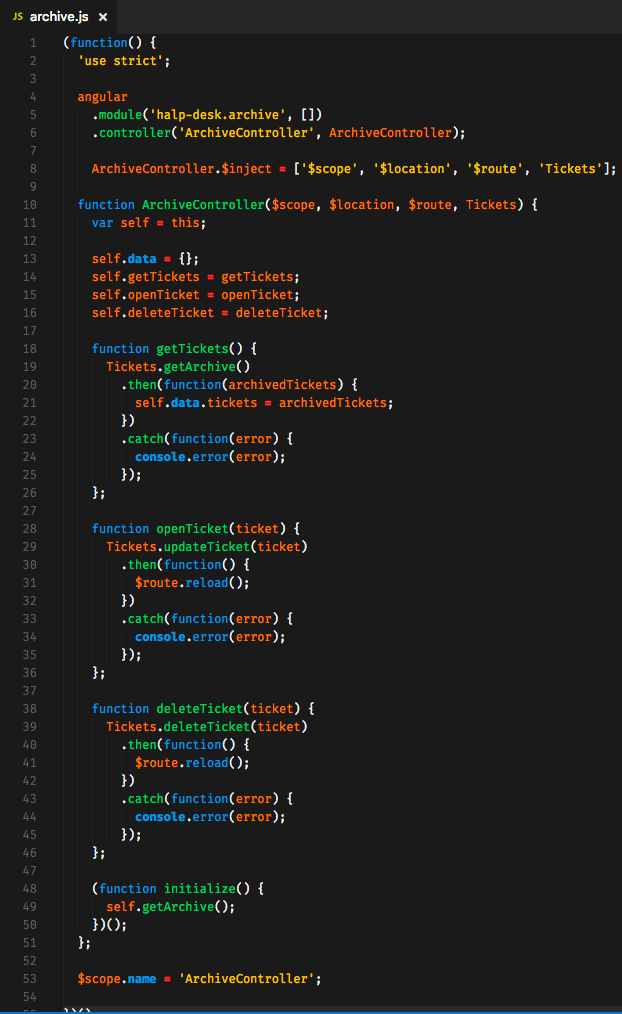
Step 9 — Create the Archive Tickets View and Controller
The archive view and controller are the same as the open view and controller, but adjusted slightly. Instead of archiving a ticket in the archive view, we can reopen it.

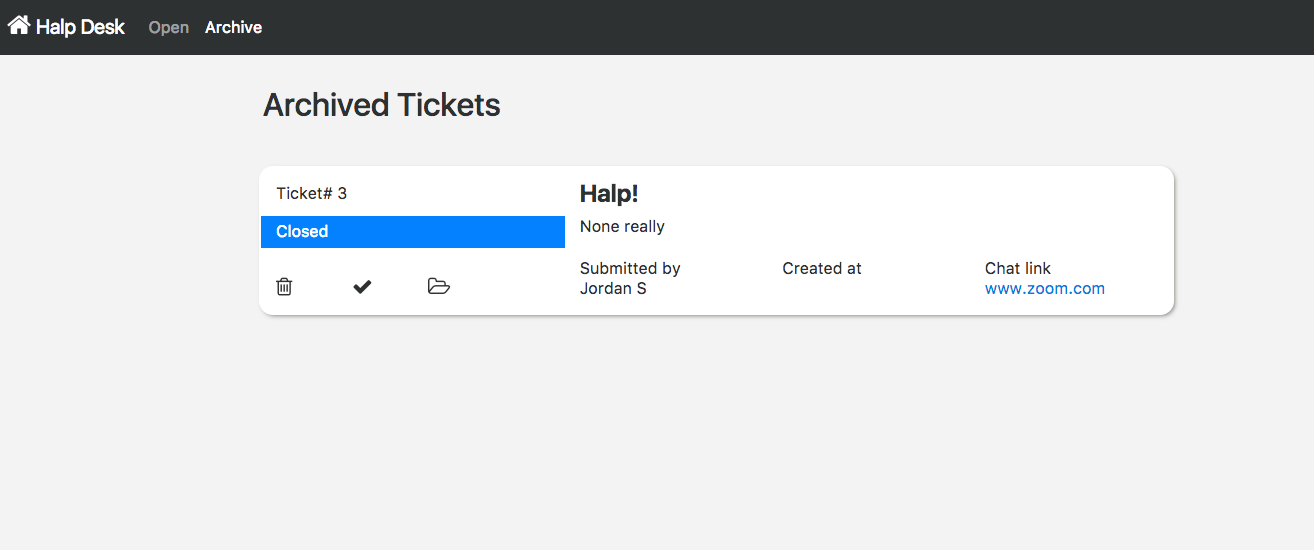
Step 10 — Add Some Style
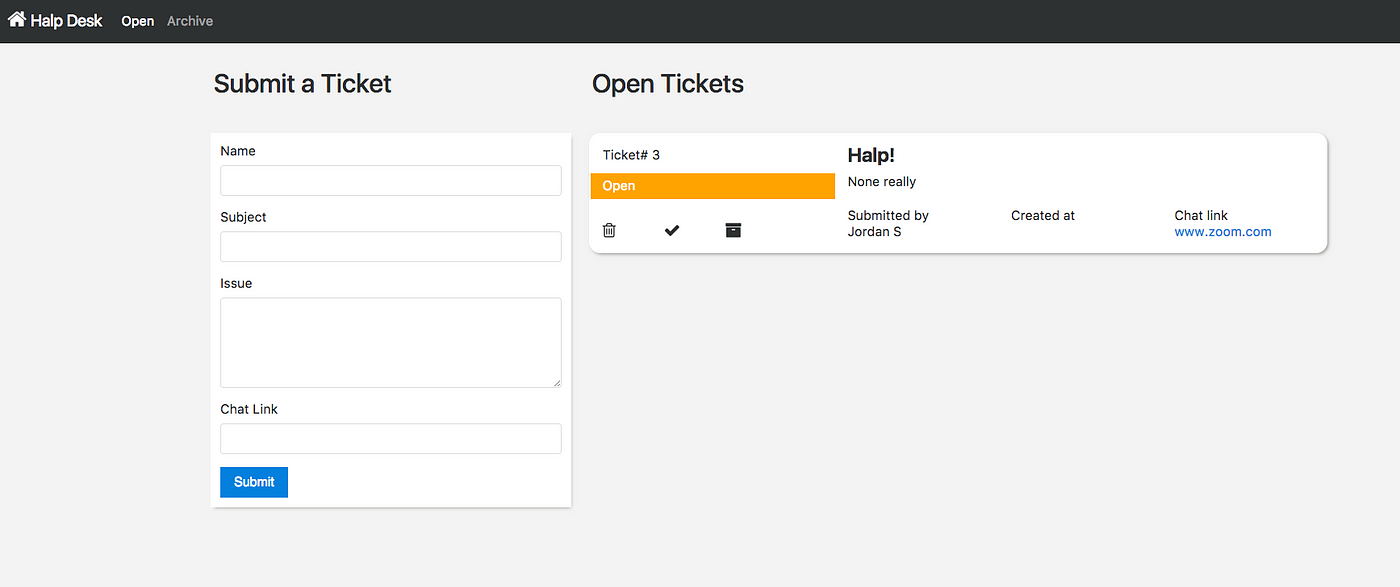
The styles are optional. You can check out my stylesheet here. The final product looks like this:
How To Create Single Page Application In Angularjs
Source: https://medium.com/@jstubblefield7939/part-ii-front-end-creating-a-single-page-application-with-angularjs-719192b27bd
Posted by: pattonprixed.blogspot.com
0 Response to "How To Create Single Page Application In Angularjs"
Post a Comment